KNX Address Management
When you click on Manage Addresses in the KNX menu, the following dashboard appears. This provides an overview of all current KNX projects and manually added group addresses.
Dashboard Explanation:
Projects:
Here, all uploaded KNX projects are displayed.
The table shows the following information:
File Name: The name of the uploaded KNX project, e.g., "abc.knxproj".
Name: The project name.
Last updated: The date when the project was last updated or uploaded.
Actions:
Several actions are available for each project:
Address List: Click this button to view the group addresses of the project.
Delete Project: Use this button to delete a project if it is no longer needed.

Manually Added Group Addresses:
In this section, you can add group addresses manually if they are not included in an uploaded project.
To add a new address, click on Add New Address. A dialog will open where you can enter the details for the group address (e.g., address, name, and type).
Manage Adresses/Adress List
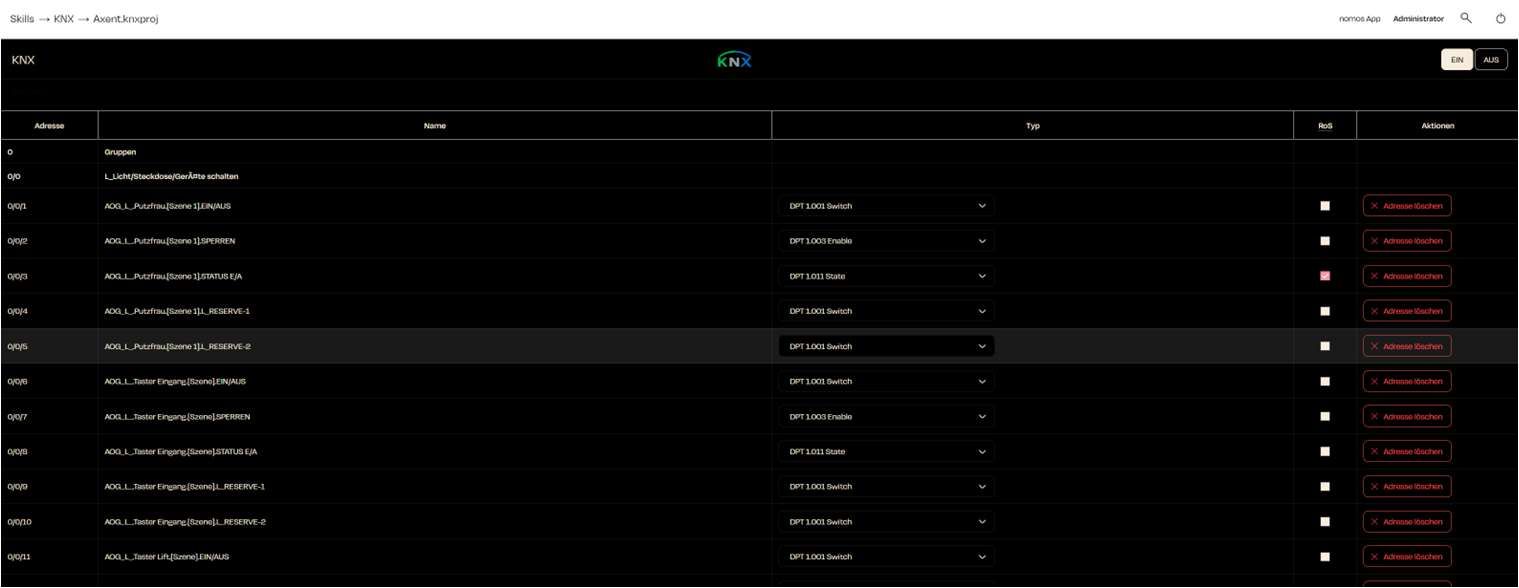
When you click on Address List for a KNX project, the following overview is displayed. This address list shows all group addresses of the respective KNX project and allows you to manage and adjust addresses..
Overview of Adress List:
Address:
This shows the group addresses defined in the KNX project.
Example: “0/0/0” for switching devices.
Name:
The name of the group address describes what the address is used for, e.g., “Light/Socket/Switch Devices” or “Button Input ON/OFF”.
Type:
Here, you can select the data type for the respective address. The system offers various KNX Data Point Types (DPT) that define the type of communication, for example:
DPT 1.001 Switch: For switching functions.
DPT 1.003 Enable: To activate/deactivate functions.
DPT 1.011 State: To display the status of a device.
RoS (Read on Start):
If this box is checked, the group address will be read at system startup to check the current status. This can be helpful to ensure that the system always knows the current status of devices.
Actions:
Delete Address: Here you can remove group addresses that are no longer needed by clicking "Delete Address."

Add Manual Address
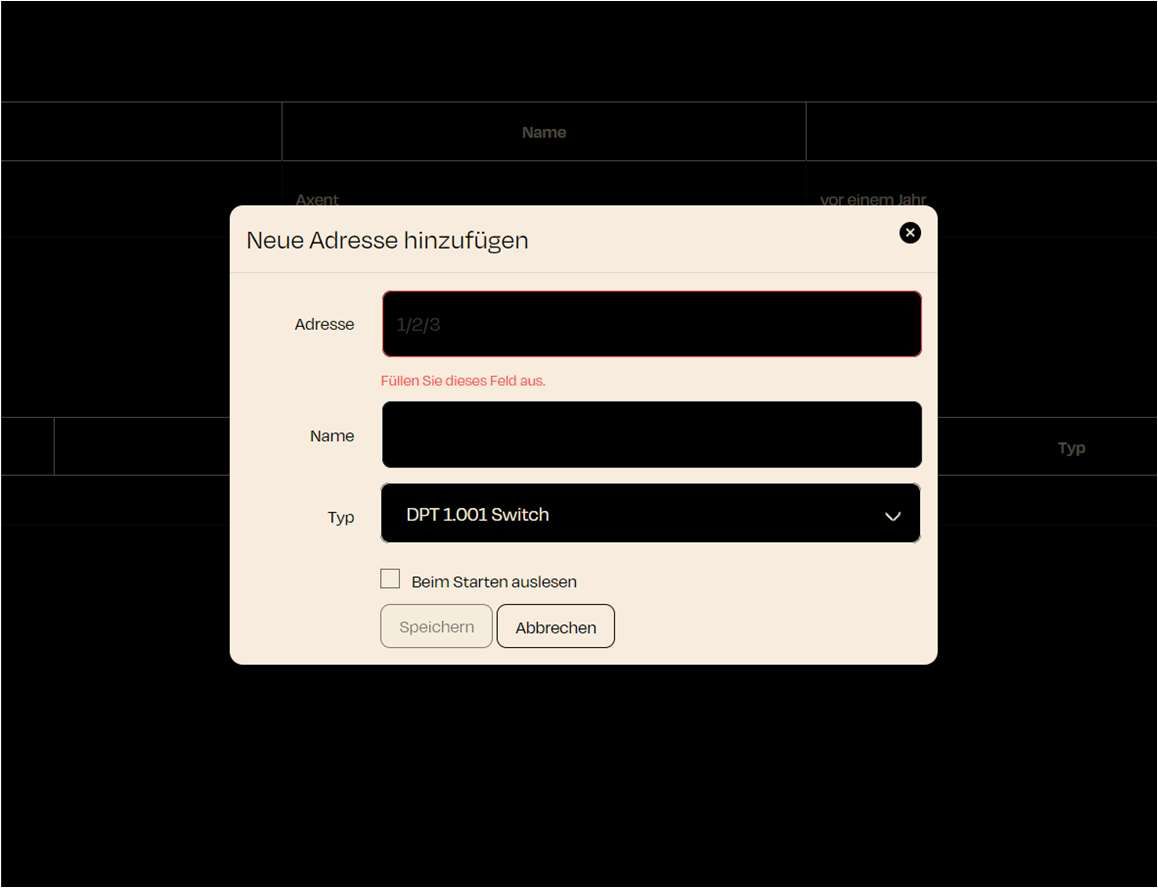
If you want to add a new group address manually in the KNX project, a new window will appear.
Enter Address:
Please enter the desired group address in the format X/X/X (e.g., “1/2/3”).
This field is required and must be filled out correctly.
Name of the Address:
Give the address a name that describes its function (e.g., “Living Room Light”).
Set Type:
Select the appropriate data type (DPT) for the group address. This determines what kind of data or commands will be sent or received through the address.
Reading on Startup (optional):
Check this option if the address should be read at system startup to capture the current status.
This feature is useful when it is important to know the state of a device at startup.
Save or Cancel:
Click on Save to add the group address to the system.

Zuletzt aktualisiert