> For the complete documentation index, see [llms.txt](https://documentation.nomos-system.com/nomos-system/llms.txt). Markdown versions of documentation pages are available by appending `.md` to page URLs; this page is available as [Markdown](https://documentation.nomos-system.com/nomos-system/integrator-en/skills/shelly.md).
# Shelly
This integration connects **Shelly** Wi-Fi devices directly to the nomos system controller – no Shelly Cloud, no additional bridge. The controller configures the device itself when it is added: from then on the device reports directly to the controller and can be used like any other device in rooms, scenes and automations.
Both device generations are supported – the classic first generation as well as the current Plus, Pro and Gen3 models. Among them: relays and plugs, dimmers and lights (including RGBW), roller shutter actuators, energy meters, radiator thermostats, and the battery-powered sensors and buttons (door/window, temperature/humidity, smoke, motion, Button).
{% hint style="warning" %}
**Before you begin:** The Shelly must already be on your Wi-Fi and in the same network as the controller. Bring new devices into the network first, using the Shelly app or the access point the device opens by itself.
{% endhint %}
**Adding a device:**
1. **Enable the integration:**
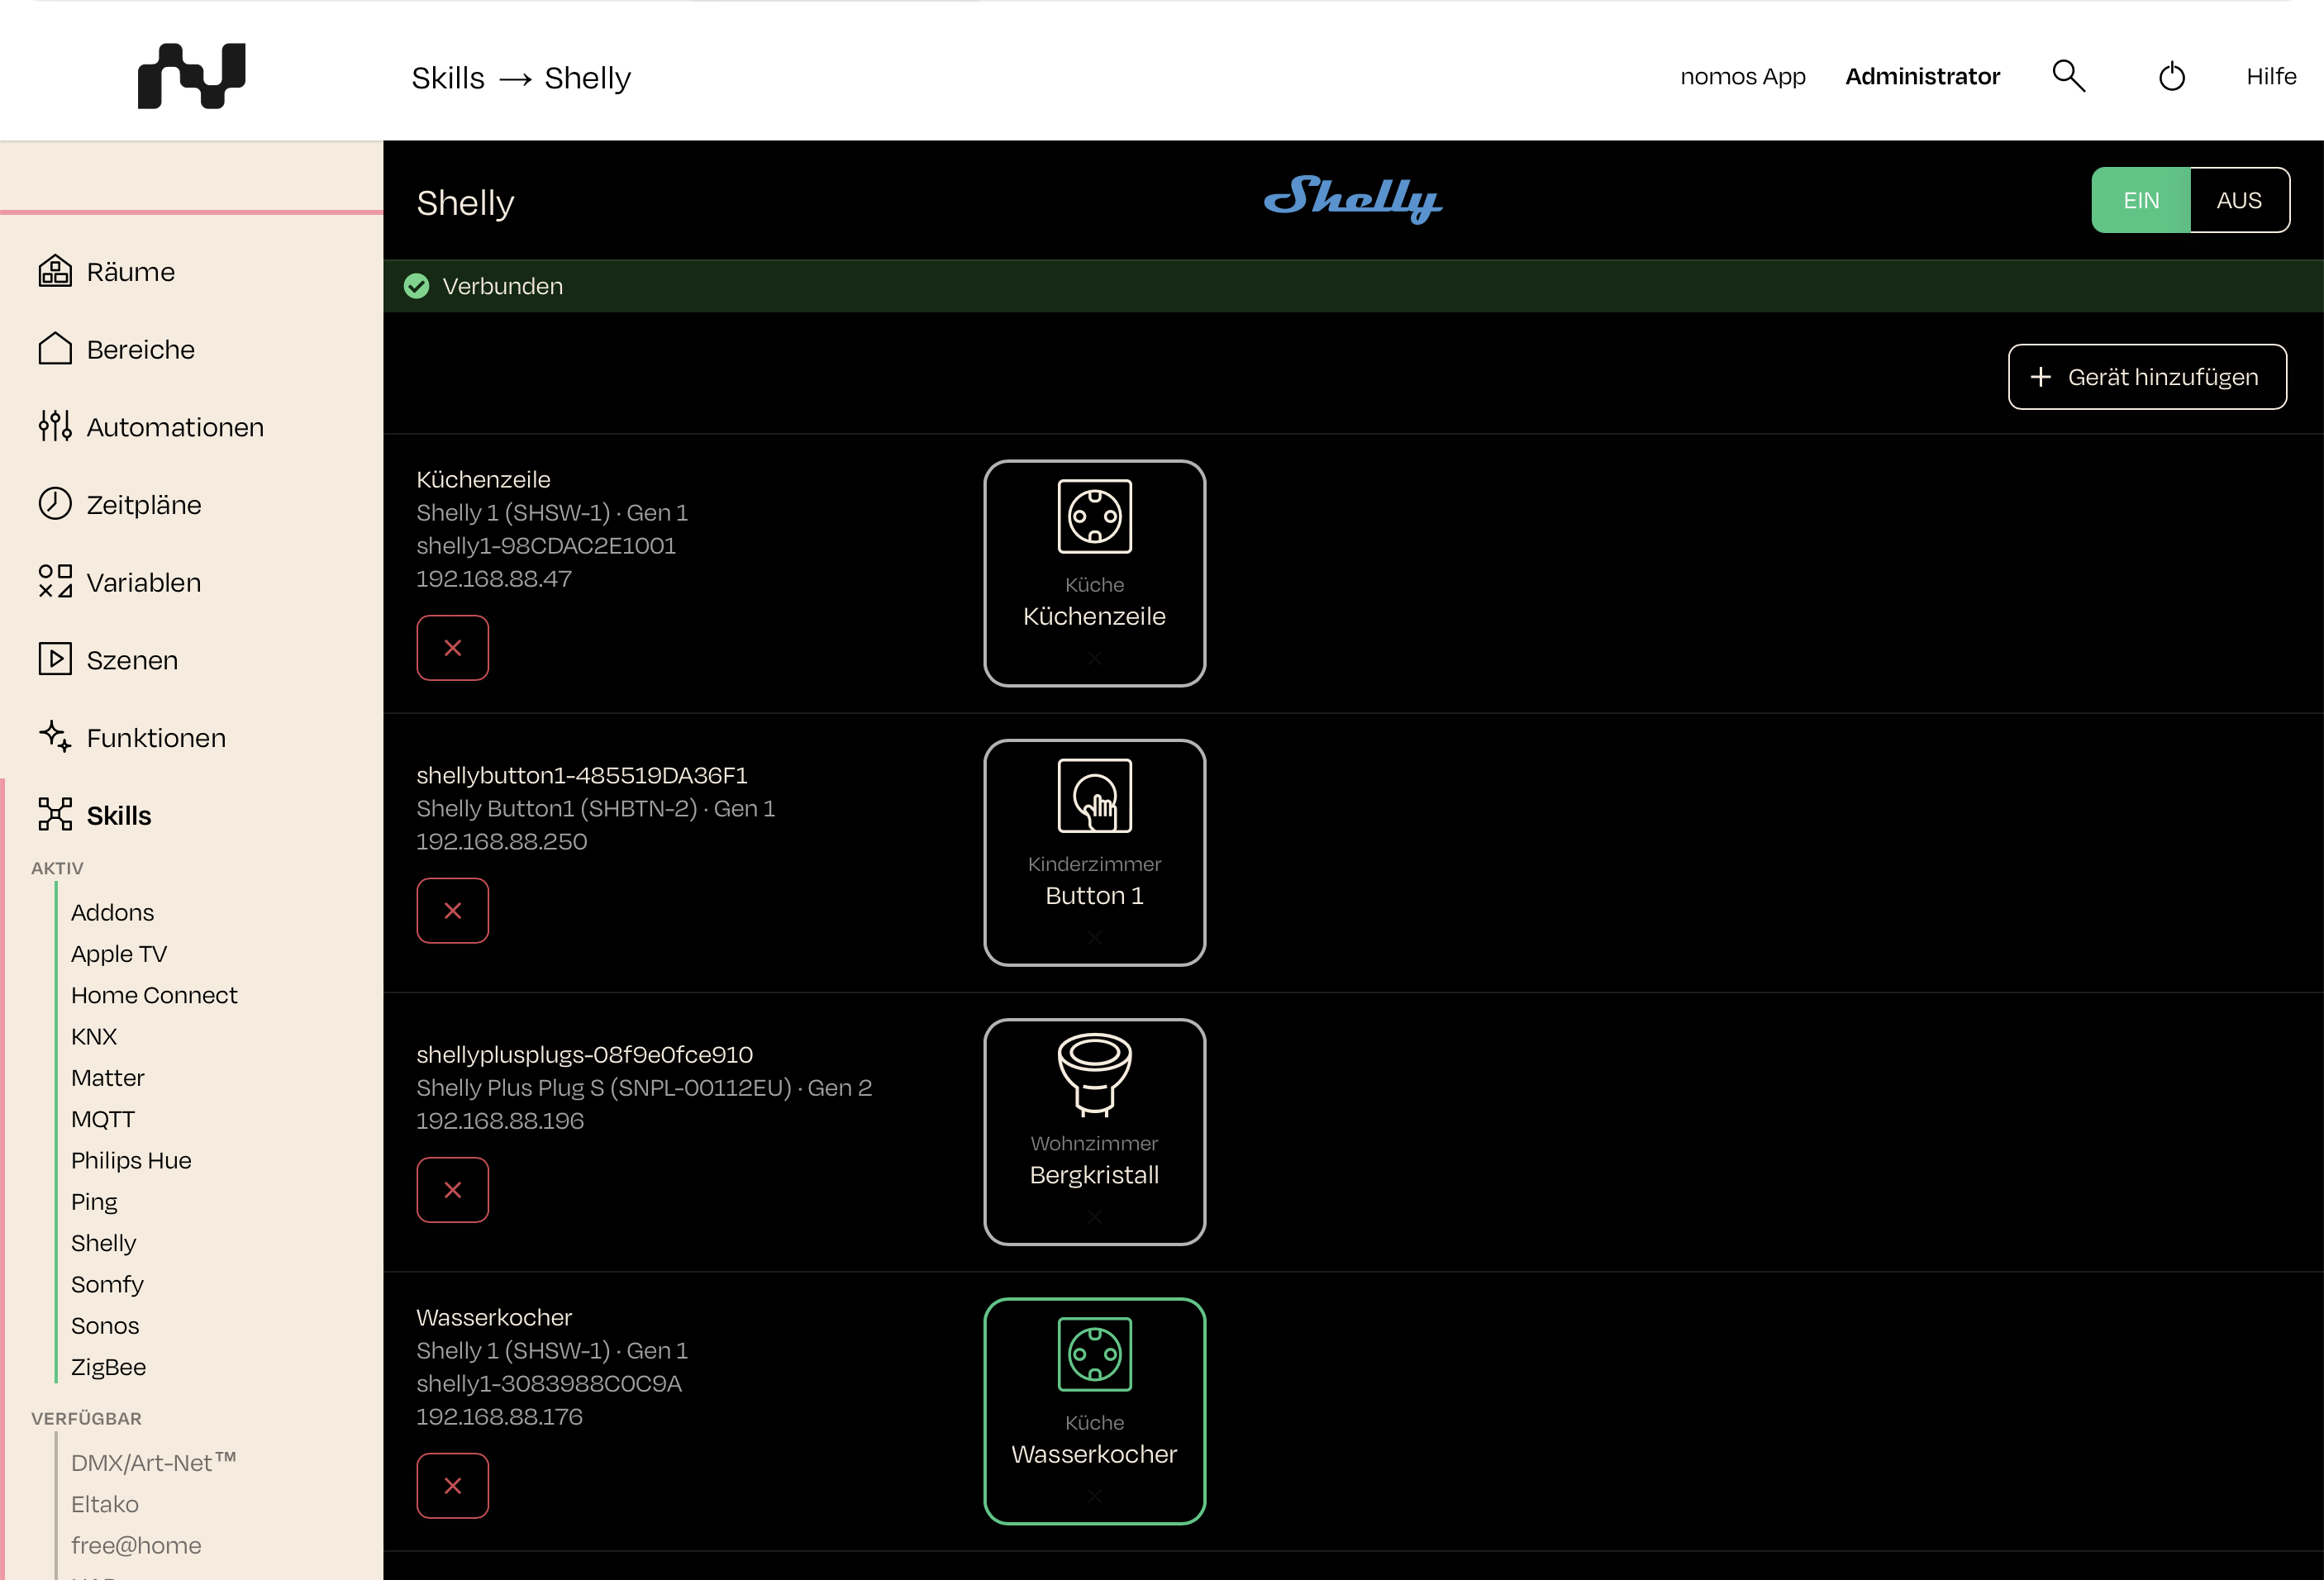
* Switch the **Shelly** skill on. The skill page then shows the list of connected devices.
2. **Pick the device:**
* Click **Add Device**. The controller searches the network and lists the Shellys it finds, each with its identifier and address; devices that were already added are marked as such.
* If a device does not announce itself – because mDNS is switched off, or it sits in a different network segment – enter its **IP address** by hand.
3. **Credentials:**
* If the device is password-protected, the dialog asks for the login. On the newer generations the username is fixed to **admin**; on the first generation it is freely chosen.
4. **Shelly Cloud notice (first generation only):**
* First-generation firmware holds either the connection to the Shelly Cloud or the one to the controller – not both at once. From the moment the device is added, nomos is what reaches it from outside your home; the Shelly app still finds it inside your own network, but no longer over the internet.
5. **Name and room:**
* Optionally assign a name – without one, the name the device carries itself is used – and pick the room.
6. **Add:**
* Adding takes up to half a minute: the device is reconfigured, reboots, and has to report back to the controller.
{% hint style="info" %}
**Battery-powered devices sleep.** Wake the device right before adding it – for the Button a single press is enough, sensors have a small button on the case – so the controller can configure it. Afterwards these devices report whenever they wake on their own; battery level and readings update at that rhythm.
{% endhint %}
{% hint style="warning" %}
**"Another component already addresses this device":** This warning appears when an older component in the controller – for example one imported from a manually installed addon profile – already addresses the same device. Two components on one device switch each other. Continue only if you are going to delete the other component afterwards.
{% endhint %}
**The overview:**
Each row shows the device's name, its identifier (it ends in the MAC address, which is also printed on the device), model and generation, and the IP address – clicking it opens the device's own web interface in a new tab. To the right sit the components created from the device; a device with several channels has several. The banner at the top sums up the state of all devices.
**When a device reports a problem:**
A message underneath the device says what is wrong; **Repair** re-runs the setup against the stored – or a corrected – address:
* **"The device is not reporting to the broker."** – The device is currently unreachable, for example powered off or out of Wi-Fi range. Once it reports back, the message clears on its own.
* **"Setup was interrupted …"** – An earlier add did not run to completion. **Repair** catches up on the missing steps.
* **"MQTT was switched off on the device."** – The connection to the controller was disabled on the device itself, on the first generation for example by re-enabling the Shelly Cloud. **Repair** restores it.
* **"The stored login is no longer accepted."** – The device's password was changed. **Repair** asks for the new credentials.
* **"The device cannot be reached under its stored address."** – The device received a new IP address. Enter it under **Repair**.
{% hint style="info" %}
**Tip:** Give Shelly devices a fixed IP address in your router (DHCP reservation). A changed address is the most common reason for a device suddenly being listed as unreachable.
{% endhint %}
**Removing a device:**
The **×** in the device row removes a device. Its components are deleted from rooms, scenes and automations, and its access to the controller is revoked. The device itself stays on your Wi-Fi and keeps working on its own – through its switches and its web interface.
---
# Agent Instructions
This documentation is published with GitBook. GitBook is the documentation platform designed so that both humans and AI agents can read, navigate, and reason over technical content effectively. Learn more at gitbook.com.
## Querying This Documentation
If you need additional information that is not directly available in this page, you can query the documentation dynamically by asking a question.
Perform an HTTP GET request on the current page URL with the `ask` query parameter, and the optional `goal` query parameter:
```
GET https://documentation.nomos-system.com/nomos-system/integrator-en/skills/shelly.md?ask=&goal=
```
`ask` is the immediate question: it should be specific, self-contained, and written in natural language.
`goal` is optional and describes the broader end goal you are ultimately trying to accomplish on behalf of the user. GitBook uses it to tailor the answer towards what is most useful for that goal.
The response will contain a direct answer to the question and relevant excerpts and sources from the documentation.
Use this mechanism when the answer is not explicitly present in the current page, you need clarification or additional context, or you want to retrieve related documentation sections.